PC build guide: the best budget gaming PC

Building PCs for gaming can get expensive. It’s easy to put together a cart or two that quickly swells to two or three thousand dollars. Can everyone afford such a machine? No. Some—actually, many—people have stricter budgets and bills to pay. But that doesn’t mean you can’t build a PC you can be proud of. If you're prudent about part choices, you can still build a PC that will play most games available today at reasonably good settings.
PC BUILD GUIDES

The best cheap gaming PC(<$500/£500) - Our alternative to buying a console.
The best budget gaming PC(~$750/£750) - A good entry-level system.
The best gaming PC(~$1,250/£1,250) - Our recommended midrange build for most gamers.
The best high-end gaming PC(~$2,000/£2,000) - Everything a gamer could want.
The best extreme gaming PC(>$3,000/£3,000) - You won the lotto and are going all-in on gaming.
Building a budget gaming rig often poses more challenges than one with a budget of $2,000 or more. Budget builds can be easier to assemble, but picking parts can be a bit of a nightmare when you're trying to stretch every dollar as far as it will go. This guide is here to give you a bit of insight if you’re looking for a rig that won't break the bank.
This build is designed with a $800 price point in mind, cutting out extras such as an optical drive or a large HDD. Since storage is one of the most flexible parts of any build, we opted for our favorite overall SSD in a 500GB size. This will give you enough space for your OS and plenty of games, but if you have a bit of budgetary room to spare, a large HDD will complement the SSD nicely. Similarly, you can drop down to a 256GB SSD to shave a few dollars off the price.
Performance-wise, you should expect this build to perform very well at 1080p and decently at 1440p. It won't be great at CPU-heavy tasks and will slog at 4K, but that should be expected given the price point.
The price point also doesn't account for the operating system or any peripherals. Check out our buying guides to the best mouse, keyboard, and gaming monitor for our favorite picks to pair with your new rig. It's also worth noting that this build utilizes an AMD graphics card, which means you can pair it with a Freesync monitor—much cheaper than their G-Sync brethren.
Components

We based this build on prices we could find at the time we updated this article, but prices do change. You will find current prices for the parts in the above table, including prices for non-US locations.
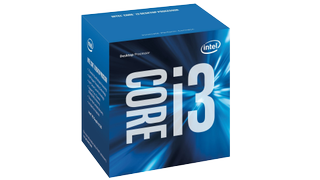
CPU: Intel Core i3-6100
It was tough to choose this CPU, it really was. But after long deliberations and fretting over cores, cache, Hyper-Threading, and clock speeds, the determining factor that slapped me in the face was price.
Intel’s Core i3-6100 is a dual-core CPU with 3MB of cache, Hyper-Threading, and a clock speed of 3.7GHz that retails for under $120. In comparison, the i5-6400 is a quad-core CPU with a base clock of 2.7GHz (and a turbo up to 3.3GHz) and 6MB of cache that goes for about $183. While both CPUs have the same number of threads, the i5 does so with physical cores instead of Hyper-Threading. That means each thread gets its full 1.5MB of cache, rather than having to split up that cache with a second thread.
Even with its lower base clock of 2.7GHz and a 3.3GHz turbo, the i5 on its surface looks like a worse buy than the i3, which isn’t true if you look at all of the variables at play. However, considering that the i3 is over $60 cheaper than the i5, I decided to go with the i3 part. This allowed budgetary breathing room for better parts elsewhere. If you’ve got a few extra dollars to spare, the i5-6400 or i5-6500 are both worthy upgrades for this build.
All of Intel’s non-K (locked) Skylake CPUs come with heatsinks and fans, which are just fine for keeping these processors’ heat under control. If you want to upgrade to an i5-6600K or i7-6700K, you’ll have to pay for an aftermarket air or liquid cooler too. If you take that route, you'll also need to bump up to a motherboard that supports overclocking. It'll be more expensive, but will definitely help you stretch the life of your system by a few years.
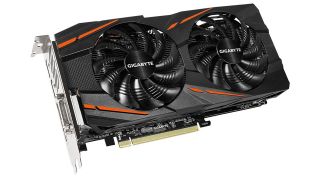
GPU: AMD Radeon RX 480 8GB
This year, new graphics card launches from AMD and Nvidia blew the lid off the status quo GPU landscape. On the high end, the GTX 1080 and 1070 offer ridiculous improvement over last year's cards, both in terms of price and performance. But the goodness doesn't stop there—it trickles all the way down the company's line of 10-series cards. Similarly, AMD's new RX 480 and 470 offer excellent performance at a mid-tier price point.
There's a lot that goes into deciding which graphics card is ultimately 'best' for any price point. In terms of pure performance per dollar, the GTX 1060 3GB makes a strong showing, but we're leery of the limited VRAM. 3GB may prove a serious handicap in the near future, and it's already having an impact in current games. AMD's RX 480 8GB and the GTX 1060 6GB are the next step up, and the RX 470 8GB is also worth a look, but ultimately we went with the RX 480 as the best combination of current price and performance combined with future potential.
The RX 480 can easily break into the 60fps or higher range at 1080p and nearly max settings, and it typically outperforms the GTX 1060 6GB in DX12 and Vulkan enabled games. And if you fall a bit short now and then, tweaking a few settings should make up the difference without a drastic drop in quality. If you're not as worried about VRAM, consider the RX 480 4GB model as an alternative that will knock about $30 off the price.
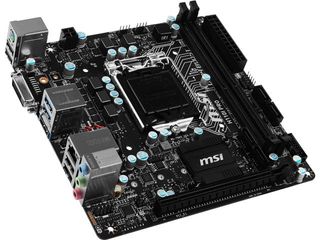
Motherboard: MSI H110I Pro
There's no qualms about it—the H110I Pro is a cheap motherboard. But it gets the job done, and does so at a very budget-friendly price point. It's compact and easy to install, and features a simple and easy-to-navigate BIOS, which is appealing to newbie builders.
That said, the board does come with a few caveats. The H110 chipset doesn't support overclocking, even if you have an unlocked CPU. It also only supports a maximum of 32GB RAM, despite being compatible with Skylake processors that support up to double that. Of course, 32GB (let alone 64GB) is borderline overkill, even for a high-end machine. Either way, we're only using 8GB, so no issues there.
If you're wary of using such a budget board, we recommend jumping up to the Gigabyte GA-Z170N-WiFi. It's a fair bit more expensive, especially for a budget build, but it offers a number of upgrades over the H110. By going with the Z170 chipset, you’re able to overclock your memory if need be, and it offers an upgrade path that allows you to take advantage of an unlocked Skylake i5 or i7 in the future. When talking about budget PCs, an upgrade path isn’t something to sneer at.

Memory: 8GB Kingston HyperX Fury DDR4-2133
There’s no shortage of options when you’re shopping for memory, especially when you’re looking at the cheap kits. At 2133MHz, this kit occupies the lowest rung of the DDR4 ladder. That doesn’t mean it can’t serve you well.
This kit from Kingston offers XMP 2.0 support. Then again, so do most kits nowadays. The kit is also a potential suitor for ASRock’s non-Z OC, though we haven’t tested it just yet.
Memory in this frequency bracket—and several rungs higher—is highly commoditized, so the buying advice is basically to find a reputable brand and find the capacity and speed you’re looking for. If two competing kits look similar in price, capacity, and speed, check the timings. Finally, choose a kit that matches the aesthetic you want in your case. (That sometimes means paying a little extra for a different color, though.)
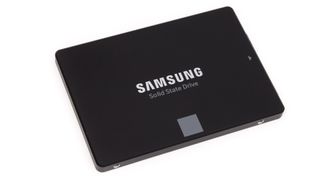
SSD: Samsung 850 EVO 500GB
Storage is a tough thing to recommend, as the amount people think they need is very subjective. But no matter how much storage you need, it being an SSD is essential.
Our favorite SSD for gaming is the 500GB Samsung 850 EVO. It's very similar in technology to Samsung's high-end 850 Pro, using vertically arranged 3D NAND flash memory. Long story short: it performs excellently at a reasonable price point.
In this build, we opted for a single 500GB SSD as the primary drive. 500GB gives you enough space for your operating system and a handful of games. You might not be able to keep a massive library downloaded at once, but you also won't need to delete a large game every time you want to play something different.
To save money, drop down to the 256GB variant of the 850 EVO. On the flip side, if you need more storage, your best bet is to pair this drive with a secondary HDD of the 1 or 2TB variety. We recommend the WD Black (around $77 at Newegg for 1TB) if going that route.
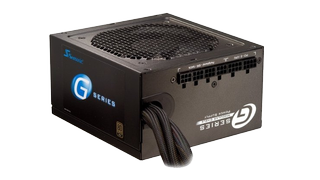
Power supply: SeaSonic G Series 550W 80 Plus Gold
Like memory, most power supplies from major vendors tend to be of high quality, and I don’t recommend skimping on PSU quality. This semi-modular 550W SeaSonic is 80 Plus Gold certified and comes with a 5-year warranty. For this price, you won’t find many other modular PSUs that offer that.
Unless I’m building in a really, really tight case, I generally recommend going with a semi- or fully-modular power supply. With detachable cables, you can ensure that you only use the cables you need. (I rarely end up using the Molex connectors, for example). You can keep the spares tucked away for future upgrades, or replace a cable if it becomes damaged. This can greatly improve airflow and will aid in cable management.
When looking for a power supply, I recommend looking for a unit with an efficiency rating of at least 80 Plus Gold and a warranty of no less than five years. I’ve suffered from a failed PSU once before (circa 2004). It’s a bit terrifying to have your screen suddenly blacken with a popping noise and notice a faint smell of burnt electronics in your room. Do yourself and your PC a favor and invest in a good PSU. Your precious components will thank you.
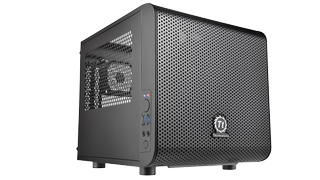
Case: Thermaltake Core V1
I’m a big fan of the mini-ITX form factor. If you’re one who goes to LAN parties, or just wants a machine that takes up less real estate on or under the desk, mini-ITX is where it’s at. The downside to mini-ITX cases is that they can often be a royal pain in the the butt to build into. Not so with Thermaltake’s Core V1.
The case by default is a horizontal-layout, meaning that the motherboard lays flat and the GPU stands upright. This is nice since it puts less stress on the PCIe port. This is only “by default” because the case has four symmetrical removable panels. That means one side can easily become the bottom, and you can choose where to put the window. That’s pretty neat.
In terms of size, the V1 is small enough to fit on a desk, but big enough to accommodate a 10-inch (255mm) video card in the “inner chassis,” though there’s a cutout that allows for another 1.2 inches of length.
Under the motherboard tray, you’ll find the drive cage and PSU compartment. I like these dual-chamber designs, especially in small cases, as they provide a place to stash cabling.
With a miniature price tag, the Core V1 is a good inexpensive case that’ll let you show off your build.
___________________________________________________________________________________
A note on affiliates: some of our stories, like this one, include affiliate links to stores like Amazon. These online stores share a small amount of revenue with us if you buy something through one of these links, which helps support our work evaluating PC components.
join us
facebook:http://adf.ly/1biS52
blogger:http://adf.ly/1biRxM
youtube:http://adf.ly/1biRbc
twitter:http://adf.ly/1bgfVg
instagram:http://adf.ly/1biS6S
reddit:http://adf.ly/1biS7z
google+:http://adf.ly/1biSD5
leave a comment!
No comments:
Post a Comment